Autumn

 I'm not sure if it's the weather or the colors of the season,  or something else, but I always seem to get in a crafty mood in the Autumn. 

This Autumn has proven no different, however my life circumstances have been different. I am currently without my crafting supplies or space for crafting,  living in an rv while we build a new house. 

So here is a throwback to a craft I did last fall.


Hopefully by next fall I will be back to crafting.


Easy 3D Burlap Pumpkin Decorations for Under $5


I saw a pin on Pinterest where some clever, crafty person used a wire hanger as a frame for building an ornament wreath.
Since I have a plethora of wire hangers that never seem to be used to hang my clothes, I was inspired to come up with a way to use wire hangers in Fall decor.
I had been attempting to make a papier mache pumpkin over a balloon (see this pin) but it turned into a glorious example of a pinstrosity. We're talking Epic Fail. Whoever was able to execute that technique successfully - I salute you, you talented crafting goddess, you.
So looking for a crafting material that was less.... gooey, I went to Dollar Tree and found these nifty spools of totally un-gooey burlap ribbon. Score! Then by chance at Walmart, I found these slightly more expensive spools of orange burlap ribbon. Although the $2.24 Walmart spools are a little wider, both are 9 ft long and that's the important part for our purposes.

At first I was thinking of making a 2D pumpkin wreath using one wire hanger, but decided that more hangers could make a cool 3D pumpkin like I was attempting to make in the first place.
I chose to use 4 hangers to make a pumpkin with 8 "ribs" but you could also choose to use just 3 hangers.
First, bend the hangers into the shape of a 2D pumpkin.

Then place two together so that they cross at the top and bottom, and use some wire to attach them.

Then add one or two more to fill out the rest of the pumpkin shape. Bend the hooks of the hangers so they all come together and straighten them a little to resemble the stem of the pumpkin. I used heavy pliers for this part to save my fingers. Then I wrapped the "stem" in wire to make sure it all stayed put.

Now comes the fun part. Stretch a hole into the end of one ribbon and slide it down over the stem. then choose one hanger and start wrapping the ribbon around it, continuing all the way around it and back up to the stem. If you've wrapped it tight enough, you should have used about half of the spool, and can now wrap another whole hanger with the rest. I used wire to attach the end of the ribbon to the stem when I was done.

Repeat with another spool of ribbon and you will have covered all 4 hangers and are now ready to wrap the stem.
I chose to wrap my stem using jute and a hot glue gun.

To sum up-

Materials needed:

3 or 4 wire clothes hangers
Wire (I used a fine gauged florists wire that I had on hand)
Wire cutters and pliers
2 nine foot long spools of burlap ribbon
Jute
Hot glue gun, sticks of hot melt glue

Instructions:

1. Bend hangers into pumpkin silhouettes, leaving the hooks as a "stem"
2. Attach hangers at the top and bottom with wire so that they cross and make a 3D pumpkin shape
3. Using pliers, bend the hooks so they come together and form a stem shape. Secure with wire.
4. Wrap hangers with ribbon, using one spool per two hangers, secure ends with wire or glue gun.
5. Wrap "stem" using jute and glue gun.

I hope you enjoy this craft as much as I did. :)
Please post pictures, links, comments below to let me know how your project went, or to share your ideas! 

New items in the shop!


https://www.etsy.com/listing/450473998/elegant-blue-earrings-for-wedding?ref=shop_home_active_1


These earrings can be bought individually or as a set. Perfect for a wedding or coordinated family photos!


This bracelet has a magnetic clasp for convenience. I love all the colors of the semi-precious stone beads!


These stone pendant gecko necklaces were fun to make ... as soon as I got all the sand from the sandblaster out of my shoes... :)

Simple cloth wallet

This is a simple project great for using up scraps. And if I can do it, you know it's easy! (Disclaimer: I am far from an experienced seamstress and can barely remember anything from my one highschool needle arts class, so I apologize ahead of time if my methods are unconventional and if my instructions are either confusing or stupid-simple. Proceed at your own risk, and feel free to offer improvement suggestions in the comments!)


I made a little wallet like this probably back in 2011 and never wrote down measurements or instructions of how I did it. I was devastated when my purse was stolen a few years later with it inside. You'd think I'd be more upset about losing my driver's license, Social Security card (don't judge, I know you're not supposed to carry that around with you, but I had just needed it for a new job I started) my phone, cash, and international driver's license. But in reality the thing I was most upset about was losing this little wallet! I loved how it was just the right size for all my miscellaneous cards and cash and if I wanted to, I could just throw this in my back pocket and head out the door with my phone and keys and not have to worry about a purse. (And obviously I had reason to worry about a purse.)

Anyway, I figured it was time to sew another one! It's not the same fabric, alas, but pretty close.


What you will need:

  • Sewing machine, 
  • Scissors, 
  • Needle, 
  • Coordinating thread,
  • Either two coordinating pieces of lightweight cotton fabric each 5.5 inches wide and 8 inches long or 
  • One piece of fabric 5.5 inches wide and 15 inches long. (I like the look of two colors, so that's what I used for this tutorial.)
  • Button or snap (I prefer the convenience of the snap)
  • Steam iron and ironing board
Start with the two pieces of fabric right sides together and sew the two short sides with 1/2 inch seams.


Iron the seams flat and turn it right sides out.


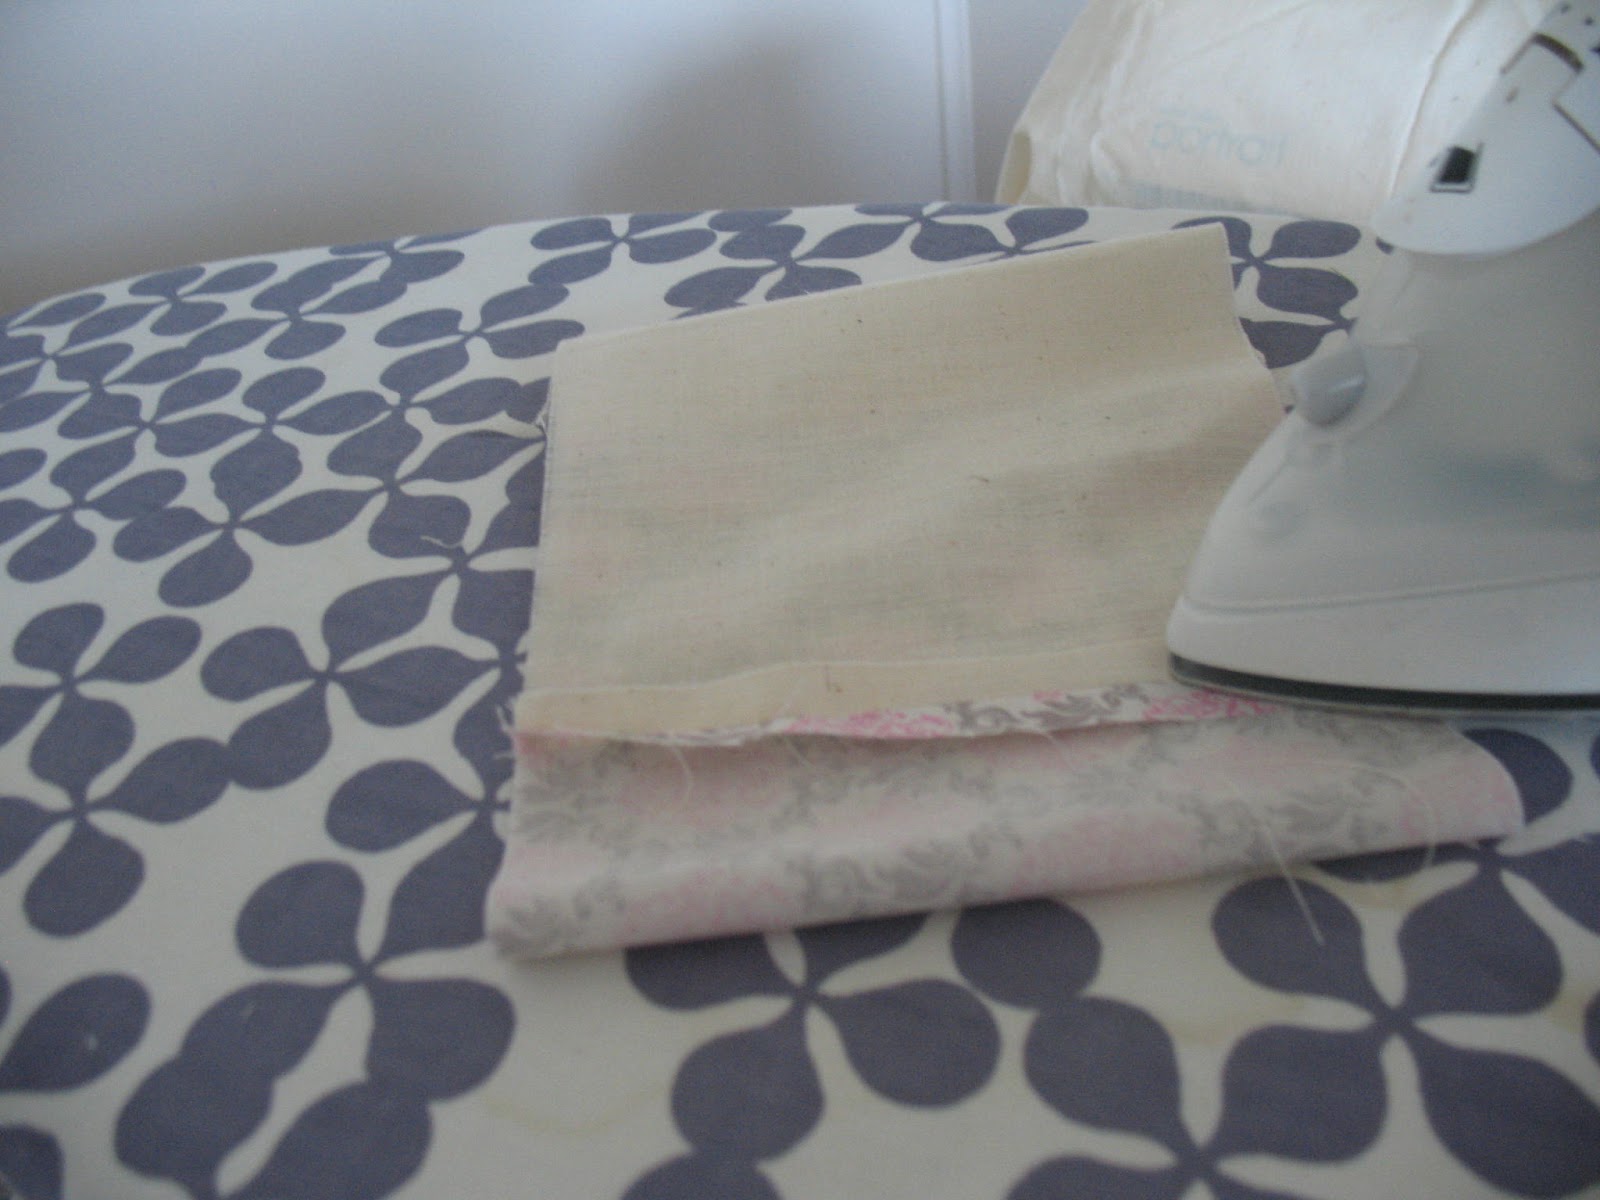
Lay it on your ironing board with the seams off center by about an inch.


Decide which color will be your top flap (mine is cream) and lay the project down with the side with more of that color facing up. Fold the bottom up to make the pocket piece.


Then fold the top flap down and adjust until you like the size of the pocket and the flap. Iron creases to mark your preferences. Open it back up and turn it back inside out.


You can round the edges of the top flap or keep them square. (I like the look of a little rounding.) Starting at your crease for the edge of your top flap, sew the open sides shut with 1/2 inch seams, leaving a small gap for turning it right sides out again.


Tuck the edges of the gap in and iron even with the seam (should look like there's no hole after it's ironed.)


Then fold up your bottom pocket piece on your crease and top stitch along the sides to make the pocket.


Then finish with either a snap or a buttonhole and button.
I got these coverable buttons for a project making push pins for a cork board and decided to try a button this time.


Please don't laugh at my very first attempt at making a buttonhole. Personally I liked the ease of the installation of the snaps, as well as the look and convenience when using the wallet. But it was worth a try :)


If you make this project I'd love for you to post descriptions/pictures in the comments!

Happy crafting! :)

DIY Craft Cupboard Reveal


Around the middle of December our next-door neighbor put this entertainment center out on the curb with a "free" sign on it. I gasped when I saw it and said, "Greg! Will you help me get this inside?!"


He gave me his "Oh-no-I've-married-a-hoarder/Hee-Haw-am-I-just-muscles-to-you?/Again?-You've-got-to-be-kidding-me" look. Obviously I've learned to read this look quite well. So before he could protest verbally I said, "Ok, ok, I know you think I'm crazy but this would help me organize my craft room so it can all be contained and someday be a nursery when we have kids!"

I could tell he was still dubious so I said, "How about if I can get it in the garage so it's out of the snow, and do all the work on it myself, and all you have to do is bring it inside?"

To be honest I'm not sure what his answer was at the time. Probably an unhappy grunt? Whatever it was, I took it as a challenge, like, "Whatever you say. You might not be able to move it anyway."

The next day was my day off and the entertainment center was still there so I called my lovely and helpful neighbor across the street to see if she had a hand truck I could borrow. She did, and when I explained what I needed it for, she helped me to wrestle this beast into our tiny garage. No small feat, I must admit! Holy cow is this thing heavy!

Glowing with the triumph of getting it in the garage, I grabbed hubby's drill and went crazy. I lightened it up by removing the back panel, the sliding tray for the TV, the shelf for the DVD player, and all but one of the shelves in the lower cabinets.


Feeling pretty good about my power tool abilities and still riding the high from my successes thus far, I removed the doors and drawers, grabbed some rags, and cleaned it from top to bottom.


As you can see from the pictures, the bottom cabinet door had seen better days. I repaired the stripped screw holes with wood glue and toothpicks and clamped the broken piece back on with a generous amount of wood glue.


AAAAaaaaaannnnnnnndddddd......... Then it sat in the garage waiting for the temps to warm up enough so I could use the spray primer I got a sweet deal on.

Finally in February we had some crazy warm weather and I decided to tackle it. I sanded it lightly and sprayed it with the primer.

AAAAaaaaaannnnnnnndddddd......... Then it sat in the garage waiting for me to make up my mind on paint. And it sat. And it sat. And I bought paint at least three different times and took it back without even opening it because I'm that awesome at commitment.

Finally I chose a bright white paint that said it was easy clean-up. Check. Durable. Check. Painted surfaces easily wipe clean. Check. And it was also suitable for outdoor use, so I could justify buying a gallon so we could finally paint over that hideous red door in the back. (Ahem. Don't ask me if I've done that yet.....)

And then the paint sat on the counter. Waiting for Greg to have time and energy and help to bring it in. And I started to wonder how long it could sit there before stirring it became a problem? And was it really the right paint? And would my husband get another hernia trying to move this monstrosity?
But Greg and our good friend Dustin surprised me by moving it to my craft room while I was visiting my parents. I felt like I owed it to them to finish this project since it was such a hassle getting it in. (They even had to take off the top piece to get it through the doorways.)


Then after whining to my mom and sister and anyone who would listen, I finally got up the willpower to tackle the beast last week. I finished painting it in two days and was riding the wave of my success so I decided to put it back together.... instead of getting ready for camping like I was supposed to. Then I selfishly asked Greg to help me figure out why the doors weren't going on like they were supposed to.

If I ever need more proof that I have the most amazing, wonderful, patient, loving, tolerant husband a girl could ask for (I won't, because he proves it all the time) I just have to remember what he said after I asked him. I don't remember his exact words but the gist of it was, "I haven't had more than 5 hours of sleep each night this week. I just put in my fourth 15+ hour day, and I just want to get ready to go camping and then go to sleep." And my stupid selfish self replied, "I know, I'm sorry. It's ok. You don't have to do it. ... It's just that I'm like 99% done and it's just going to bug me the whole time we're camping." Well, my poor, tired, sweet, patient husband sighed, asked for his drill and a tape measure, figured out that I had reversed the tracks the doors slide on, and switched them back. I don't deserve him.


When we got back from camping I noticed that the doors were still crooked for some reason. The top of one was about a quarter of an inch higher than the other. I figured out that if I switched the hinges from the bottom to the top and put the top ones on the bottom it solved the problem.

I bought some pegboard to replace the back panel and painted it a happy blue/teal. I borrowed my dad's staple gun to put it in place.


In February I had seen some fluorescent lights at the DI for just $4 and thought they might work to light the workspace. I love it when things work out like I envision them. :)

We had an Ikea return card from some things I bought for our wedding reception and didn't use. A lot of the stuff there isn't really our style, or not what we need, but I found some organizing things that I thought might work for craft supplies. Greg agreed I should go on a shopping spree! :)

I bought some things (I think were supposed to be for hanging curtains?) I thought would be perfect for hanging my tubes of fabric paint. They came in handy for other stuff, too!


I'm still deciding where to put everything, but that's the nice part about pegboard. You can rearrange as many times as you want! So if you have any suggestions on how to make it more aesthetically pleasing, PLEASE let me know in the comments. I need all the help I can get in that area!


I also bought storage boxes to organize supplies in the bottom cabinets. Please excuse my atrocious handwriting on the labels. I know. I have no business trying to use a camera, trying to be artsy, or being a former English major. It's ok. I've come to terms with these facts.

The paper filing cabinet was my Christmas present from my MIL. (She wisely gave me a Michaels gift card. Considering my craft addiction mixed with my indecisive tendencies, I'd say she knows me pretty well.) I love it! The huge box of cardstock to the left of it is also from her. I'm so spoiled!


Except for getting knobs that all match, and arranging the supplies on the pegboard (Please help!) I'd say it's pretty much done! Phew! It's been quite the journey. And if you've made it this far through this extremely long post, I'm sure you can relate!


Any and all tips and suggestions are welcome!

Have you tackled an epic project? How did it go? Let me know in the comments. :)

$15 Weekend Project


I decided to be ambitious two weekends ago and finally tackle some projects I've had around for awhile.

With the unseasonably warm weather, I didn't have an excuse for not painting. I decided to prime my armoire-turned craft hutch (pictures to come) and finally paint and re-upholster my sewing chair.

I bought the chair about 3 years ago for $7 on craigslist from a man cleaning out a storage locker. I was living in an apartment in Provo and bought a little sewing machine (complete with table) but I needed a small chair to use with it. It was the right size for what I needed and I figured I could easily fix the ripped seat in my dad's garage. So I got out my trusty little screwdriver from the BYU bookstore and unscrewed the seat from the frame. Aaaaaaannnnnnd....... that's about as far as I got.

A difficult break-up, crazy internet dating stories, a few moves, and a marriage later, it was still haunting me. :)  By now it has been left outside in all kinds of weather, and with metal rods on it (notice the nice rust streak on the seat) and the paint on the frame started to peel away. Three sheets of sandpaper and an arm ache later, I got it all sanded down. I primed it last night with some left-over primer from my armoire/craft hutch project. Today I bought some Rustoleum metallic satin nickel spray paint and painted the frame. I took apart the seat cushion and actually decided to re-use the foam form inside (after going to town on it with my new steam vac.) I used some fabric I had won for free on Listia, and I borrowed a staple gun from a wonderfully helpful neighbor and stapled the cloth on the seat.


Chair = $7 on Craigslist
Paint = $7 at Lowe's
Cloth = Free on Listia
Stapler = Borrowed from a neighbor
Primer and sandpaper = Already had at home for other projects

I like my little $15 sewing chair. :)

No major challenges on this one other than the tedious sanding. Although we did have a mishap where the puppies got out through the garage because I had left the door open a little to ventilate for painting. Oh, and finding out that the stapler I borrowed from my dad didn't work. But we found the puppies and my neighbor was kind enough to let me borrow her stapler last minute, so it's all good! :)

New items in the shop: Princess Earrings


I found these shells while in Mexico with my brother. I finally got brave enough to get out the dremel and drill  holes in them for making earrings. Since I had just finished the Elsa earrings (below) I was reminded of Ariel and decided to do some princess earrings. We'll see if I'm inspired by any other disney characters, but for now here's Ariel, Elsa, and Tiana.